License A & C-42 #458947
Originally published: January 2026
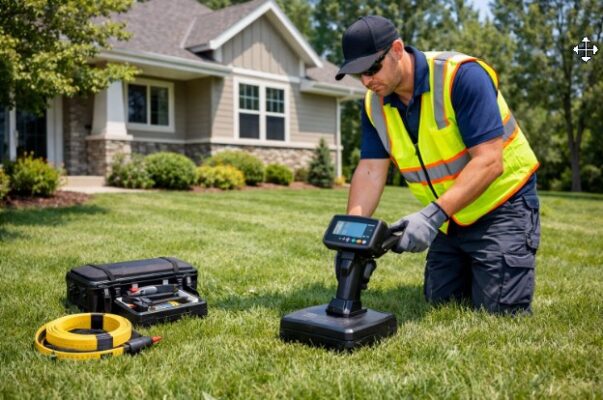
You can locate a septic tank and leach lines without wrecking your yard by using records, visual clues, and non-invasive tools such as electronic locators, cameras, and ground-penetrating radar.
A trained technician can usually pinpoint tank lids, distribution boxes, and drain lines without heavy digging by combining maps, plumbing direction, and targeted scanning.
Start by checking old permits and site plans. Then trace the sewer line exit from your house to figure out the likely zone.
After that, pros use probes, metal detectors, camera inspection, and GPR to confirm exact locations. They mark shallow test spots only where needed.

Professionals usually start with records and the home’s plumbing exit point, then confirm locations using non-invasive tools such as probes, electronic locators, and, sometimes, ground-penetrating radar.
The goal is to pinpoint the tank and drainfield path accurately and excavate only small access points—without tearing up landscaping.
First, you’ll give them property records or a site plan if you have one. They check permit files and inspect visible fixtures—cleanouts, inspection ports, and the house sewer exit—to narrow the search line.
Next, they walk the yard and mark likely routes using measuring tapes and metal probes to confirm pipe direction without deep digging. Then they deploy non-invasive tools.
Ground-penetrating radar (GPR) shows buried tanks and trenches. Electronic line locators trace metal or tracer wire along pipes.
They often use one method to confirm another. Finally, they mark the tank and leach field locations with flags and spray paint and give you a simple map and photos so you know exactly where to avoid mowing, planting, or digging.

You need clear, exact locations for the septic tank, access lids, distribution box (D-box), and the leach field lines. Knowing those precise spots helps with maintenance and inspections, and keeps you from making a costly mistake when you dig.
Locate the septic tank body first, then find the lids. The tank usually sits 10–30 feet from the house sewer exit and lines up with the basement or main drain line.
Tanks are often made of concrete, plastic, or fiberglass and measure 4–6 feet wide by 6–12 feet long for most homes. Lids (access ports) can be 2 inches to 2 feet below grade.
Mark both the tank edges and each lid separately. Use a soil probe or a metal detector over the likely outline of the tank.
If you have as-built plans or permitting records, match those measurements to what you find on-site. When probing, pause if you hit a solid surface—don’t force the probe through the lid.
Keep lids visible and accessible for pumping and inspection. Cover shallow lids with a removable soil or lightweight lid box instead of deep fill, which just makes service harder.
Identify the drainfield footprint, not every single pipe. The drainfield usually sits downhill from the tank, starting 10–50 feet away and stretching out as parallel trenches or a gravel bed.
Drain lines are perforated pipes spaced about 6–10 feet apart in sandy to loamy soils. Trenches are usually 18–36 inches deep.
Map the outer edges of wet or compacted soil, lush vegetation patches, or slight mounding; these often mark the buried leach lines’ zone. Ground-penetrating radar or sewer-line locating gear can trace lines without digging.
If there’s a distribution box (D-box), find it between the tank and the drainfield; it splits flow to the parallel trenches and is a key point for inspection and repairs. Avoid driving or planting deep-rooted trees over the footprint.
Keep utilities and heavy equipment at least the local code distance away from the drainfield to protect soil absorption and natural filtration.
Lanik Septic Service can pinpoint your septic tank and leach lines without wrecking landscaping—Schedule an appointment to get accurate markings and peace of mind.
If you’re ready to get started, call us now!
Begin by locating any maps, permits, or site plans related to your property. These records often give exact tank and leach line positions and can save you time, money, and yard damage.
Check your county or city building department first. Search for the septic system permit or septic as-built drawings tied to your property address or parcel number.
Many jurisdictions keep scanned records online. If not, ask for a paper file at the permitting counter.
Next, look at your closing documents and the home inspection file from when you bought the house. Sellers sometimes include a septic map or maintenance receipts that show tank access lids, inspection ports, or drainfield layout.
Your title company or the original builder may also have the site plan. Also, request utility maps from the local utility office before digging.
These maps show water, sewer, gas, and electric lines so you avoid hitting other buried services while locating septic components.
If you don’t find a permit or map, start with neighbors and the builder. Neighbors with similar lots often share drainfield patterns.
Contact the septic service company that did past pumping or repairs; their work orders often list tank locations or sketch the leach field.
If the paperwork still isn’t available, order a property plat or a recorded site plan from the county recorder’s office; these documents may include the septic easement or tank footprint.
As a last non-invasive step, hire a septic pro who uses probe rods, tank-finding sensors, or handheld utility locators to confirm locations before any digging.
If the system is older or the records are incomplete, mixing probing and utility maps yields the safest, least destructive result.
Follow the visible plumbing and utility routes to find the exit point and the general direction the sewer runs.
Use measured steps, simple tools, and documented fixtures to narrow the search area before digging or using intrusive methods.
You start at the building’s sewer cleanout, sink drain, or basement waste stack. Professionals open the cleanout and run a short push camera or dye test to confirm flow direction.
If a camera won’t fit, they feed a tracer wire or non-toxic fluorescent dye while a helper runs water to move the marker down the line. Use a utility probe or handheld metal detector over the run to find buried cast-iron or service lines.
Mark placed flags every few feet to create a visible line. Always call your local utility locator first and watch for electrical, gas, and water lines before probing.
Wear gloves and eye protection when opening fittings. Keep tools steady to avoid breaking seals.
These steps limit damage and give a clear, repeatable path for the next locating phase.
You might assume the tank sits directly behind the house at a fixed distance. Soil slope, older repairs, or a lateral offset can push the tank tens of feet left or right.
Pros measure horizontal run length from the building’s waste outlet and compare it with house plans or municipal records to avoid guesswork.
Clay soils and roots slow the flow, making dye or camera travel unevenly; that can make the tank seem farther or closer than it is.
Ground depressions and previous landscaping also mislead visual estimates. That’s why pros combine camera/dye results with surface probing and geophysical scans to map a “likely zone” instead of relying on a single distance figure.
You’ll use visual checks, probing tools, and detection equipment to narrow the search. These methods let you pinpoint tank edges and leach lines without heavy digging.
Walk the property and look for subtle signs indicating a tank or drainfield. Low, soggy ground patches and greener grass over suspected leach lines are big clues, since added moisture and nutrients make vegetation denser.
Check near the house for depressions or patchy soil where fill or previous repairs sit. Inspect lids, cleanouts, or vents protruding from foundations or located inside garages.
Concrete or cast-iron covers, square inspection ports, and small access lids often mark the tank. Also note driveway cuts or service trenches that may reveal original utility corridors.
Keep a sketch and measure from fixed points, such as the house corner, water meter, or driveway edge. Those measurements let you map likely tank edges and guide your next steps with probes or locators.
Use a probe rod to test soil resistance and moisture as you map suspected lines. Push a slender probe rod vertically at regular intervals — every 1–3 feet along a line you think is a leach field.
Hard resistance followed by a sudden hollow or soft zone often signals the top of a tank or a pipe trench. Water probes introduce a small water trickle into the probe hole to see if moisture moves laterally.
If water disappears quickly or pools closer to the surface, that suggests nearby drain lines or trough-like soil disturbance. Mark spots with flags and record depths on your sketch.
Probing tools are cheap and low-impact. Wear gloves and protect plantings. Stop probing if you feel a strong obstruction or hit utilities; call a utility locate service first.
Bring a metal detector to find tank lids, rebar, or cast-iron components. Sweep slowly in a grid pattern using consistent overlap.
Strong, repeatable signals near flagged probe points often indicate a concrete lid or metal riser. Metal detectors also help you locate septic tanks with metal covers, even if they’re buried under turf.
Use an electronic locator rod or tracer tied to the cleanout or a buried pipe to follow lines. You can feed a sonde or signal down a service line and pick it up aboveground with a receiver.
Verify each hit by probing carefully a short distance away before you schedule any excavation. Combine metal detection with your probing map.
When both methods converge on the same spot, you can be pretty confident you’ve found the tank or a leak line.
These tools help you find buried tanks and drain lines with less digging. Each method targets different materials and depths, so you can choose the one that best fits your property and budget.
With electronic locating, a transmitter emits a signal along a pipe or wire, and a receiver tracks it above ground. You clamp the transmitter onto a cleanout, vent pipe, or metal riser, or maybe use a probe to induce the signal.
The receiver shows both direction and depth. This method works best for metal or conductive lines and for plastic pipes with a tracer wire.
You get meter-level depth readings and a clear line trace, so mapping your sewer main or laterals gets much easier.
It struggles when utilities overlap, or signal bleed occurs, so mark nearby lines first and use a low-frequency setting when interference occurs.
Electronic locating is quick and affordable compared to heavy equipment. Many pros pair it with probing or GPR to confirm exact tank edges and avoid unnecessary digging.
A sewer camera gives you a look inside pipes, showing paths, joints, and blockages. You push a flexible camera head into a cleanout or inspection port and watch real-time video, tracking distance from the entry point.
The footage shows joints, tees, and offsets—handy for pinpointing bends or where lines leave the house.
While cameras can’t spot buried tanks directly, they can confirm the line’s direction and distance to features like tanks or distribution boxes.
If you pair camera footage with an aboveground transmitter, you can run the transmitter in the camera cable or attach it to a metal fitting. That gets you both visual and electronic location data, cutting down on guesswork before digging.
Ground-penetrating radar (GPR) shoots electromagnetic pulses into the soil and maps reflections from buried stuff or soil changes. You roll a GPR cart across the yard and read a display that shows likely tank shapes, voids, and trench lines.
GPR works on metal and non-metal objects—it’ll spot plastic tanks, concrete, and disturbed soil from drainfields. How deep and clear it reads depends on the soil; sandy, dry soils work best, while clay or wet ground blocks signals.
A trained operator reads the radargrams to tell tanks from rocks or roots. For the most reliable results, combine GPR with electronic locating and camera confirmation to get position, depth, and visual detail before digging.
Need to locate your tank before pumping or an inspection? A technician from Lanik Septic Service can find it fast—Contact us today.
If you’re ready to get started, call us now!
Here’s a quick table that matches common tools to your site’s conditions. Pick what fits your ground type, access, and how precise you want to be.
| Tool | Best when… | How precise |
| Ground-penetrating radar (GPR) | Soil is dry or sandy, and the area is clear of heavy metal debris | high — pinpoints tanks and pipes |
| Electronic pipe locator | You can trace an exposed sewer line or inject a signal | medium — follows conductors and tracer wires |
| Probe rod/hand probing | shallow soil, soft ground, and small search areas | low–medium — finds lids and shallow lines |
| Soil probing + dye test | You need to confirm the drainfield flow paths | medium — shows where effluent surfaces |
| Property records/plans | You have access to old maps or as-built drawings | variable — good starting point |
Start by checking the records and the sewer exit from your house. That narrows down where to use tools and keeps digging to a minimum.
If your yard has little metal and you want a really accurate read, go with ground-penetrating radar.
If you’ve got a tracer wire or can get to a clean sewer run, use an electronic pipe locator—it’s fast and less expensive.
Grab a probe rod for quick checks in soft ground, but stop if you feel resistance. Combine soil probing with a dye test if you suspect there are drainfield paths instead of just one pipe.
You’ll see a short checklist of steps the crew follows. They’ll leave clear marks or maps showing the tank’s location and leach lines.
The technician will try to limit digging and will explain any safety or access requirements before starting. You’re not left guessing.
The tech reviews your property records and asks about past repairs or known issues. Expect a quick walk with the crew to point out utility lines, low spots, and where your plumbing exits the house.
Next, they use noninvasive tools. They might sweep the area with ground-penetrating radar, probe with an electronic pipe locator, or run a tracer wire and transmitter if possible.
These methods help them find the septic tank lid, inlet/outlet pipes, and the start of drain lines—no heavy digging needed. If they need to confirm a spot, they’ll either do a small, targeted probe or hand-excavate a 1–2-foot test hole.
If they run into electrical or gas lines, they stop and call for utility clearance. You’ll get a quick rundown of what they found and any immediate safety steps before they wrap up.
Techs usually mark locations with paint or biodegradable flagging at tank corners, pipe runs, and inspection ports. Expect color-coded marks—bright paint for lids, flags, or stakes for leach-field trenches—so you can spot lines from a distance.
They’ll also record GPS points and snap photos of marked areas. You’ll get a simple map showing the tank’s position, the pipe direction, and rough leach-field boundaries.
The map usually notes depths at key points and spots to avoid digging later. Before the crew leaves, they’ll give you verbal instructions on protecting marked areas, plus a printed or emailed copy of the map and findings.
Here are the main reasons you might not find your septic tank or leach lines. Each one explains what usually happens and how it affects locating and maintaining your system.
Lids and access risers can get buried during yard work or over the years from settling. If risers are missing, the tank might sit just inches below the surface or several feet down, making it impossible to spot by eye.
That increases the risk of missing scheduled septic tank maintenance, such as pumping. Look for subtle hints: greener grass patches, dips in the lawn, or a cluster of vent pipes.
Use a probe rod or small soil probe in a grid near your building’s sewer exit to find the tank rim without tearing up the yard.
If you smell foul odors near the house or notice slow drainage, those clues help narrow down the problem.
When you finally find the lid, mark it. Think about installing risers or covers that sit flush with the lawn—makes future maintenance way easier and faster.
Property changes can move or hide septic parts. Driveways, patios, and new topsoil bury access points. Grading or planting new beds often covers distribution boxes and parts of the leach field.
During remodels, contractors sometimes forget to update records, so old maps go out the window. Check municipal permits, original septic permits, or past inspection reports for layout clues if you’re stumped.
If you’ve got slow drainage after a remodel or new landscaping, that work might’ve compacted the soil over the leach lines, hindering percolation. Watch for soggy spots or ponding above the field.
Call a pro with a camera inspection or electronic locating gear when records don’t help. They’ll trace pipes from the house, spot distribution boxes, and find leach lines—no need to rip up new landscaping.
If you see slow drains, wet spots, or get mortgage or permit demands, act quickly. Trained techs use the right tools and permits to find tanks and leach lines without wrecking your yard.
If a lender, buyer, or code inspector flags the tank, call a certified septic contractor right away. Escrow or closing timelines often require a formal tank location, inspection, and written report.
Pros can handle that documentation and coordinate the required repairs to meet lender or health department requirements.
If your septic system shows emergency symptoms—such as a strong sewage odor outside, sewage backing up, or soggy sinkholes over the drainfield—stop any DIY attempts.
These signs mean something’s seriously wrong, maybe even structural failure or a blockage that could spread contamination. A pro will use locating tools, dye tests, and camera inspections safely, following proper containment and protective gear protocols to keep everyone safe.
Before you start grading, digging, or moving heavy equipment anywhere near a house, call a septic locator. Contractors will mark out tank edges, leach-line zones, and chamber depths so you can plan foundations, driveways, or additions without crushing pipes or collapsing fields.
If you damage a leach field, you’ll probably end up replacing the whole thing—and that costs way more than just getting it located before you build.
Pros usually give you clear equipment limits and setback distances, depending on your system type. They handle permits and work directly with excavators to protect lines while the job’s underway.
Wear the appropriate personal protective gear and maintain an exclusion zone around marked areas. That way, you can avoid injuries and stop accidental contamination.
Avoid guesswork, broken pipes, and unnecessary digging. Book professional septic locating for your Southern California property now—Schedule an appointment with Lanik Septic Service.
How do professionals locate a septic tank without digging up the yard?
Pros typically start with records (permits/as-builts) and the home’s sewer exit point to narrow the search corridor, then confirm the tank using non-invasive tools like probing and electronic locating—digging only small access points.
What tools do septic pros use to accurately locate tanks and leach lines?
Common tools include electronic transmitters/receivers (sondes), camera-assisted locating, probing rods, and ground-penetrating radar (GPR) when layouts are unknown or hardscape limits access. These methods pinpoint location with minimal surface disruption.
Can professionals locate leach lines without excavating the whole drain field?
Yes. Pros can trace from the tank toward distribution components and use electronic locating (sonde/camera) or GPR to map drain line pathways. They typically mark the footprint so you avoid damaging lines during landscaping or construction.
How long does septic tank locating usually take?
Most locating visits take about 45 minutes to 2 hours, depending on access, depth, records availability, and whether leach line mapping is included. Hardscape, dense landscaping, or missing records can extend the appointment.
How much does it cost to locate a septic tank?
Typical costs to have a professional locate a septic tank range from $100–$450, with some providers charging an hourly rate depending on complexity. Price varies by property size, system depth, and whether line mapping or camera locating is needed.
Do I need records or permits to locate my septic system?
Records aren’t required, but they can dramatically speed up the process of locating and reducing disruption. When available, site plans and permit documents help pros narrow the target zone before using electronic locating or other confirmation methods.
After locating the tank, should I install risers or access lids?
Often, yes—especially if the lids are buried deep. Risers make future pumping and inspections faster, reduce repeat locating costs, and minimize yard disturbance over time. A septic professional can confirm the best placement once the tank is mapped.
Reviews
“This company is BEYOND helpful. Great customer service in the office, hard working employees in the field, reliable and very trust worthy. Having to replace an entire septic system is not something we ever intended on doing, but had to. If it hadn't been for Lanik Enterprises, Inc, I don't know where we would be. I HIGHLY RECOMMEND Lanik Enterprises!”
- Chanel Leos
